• TC58NVG0S3HTAI0 生命周期报告:规格与停产风险

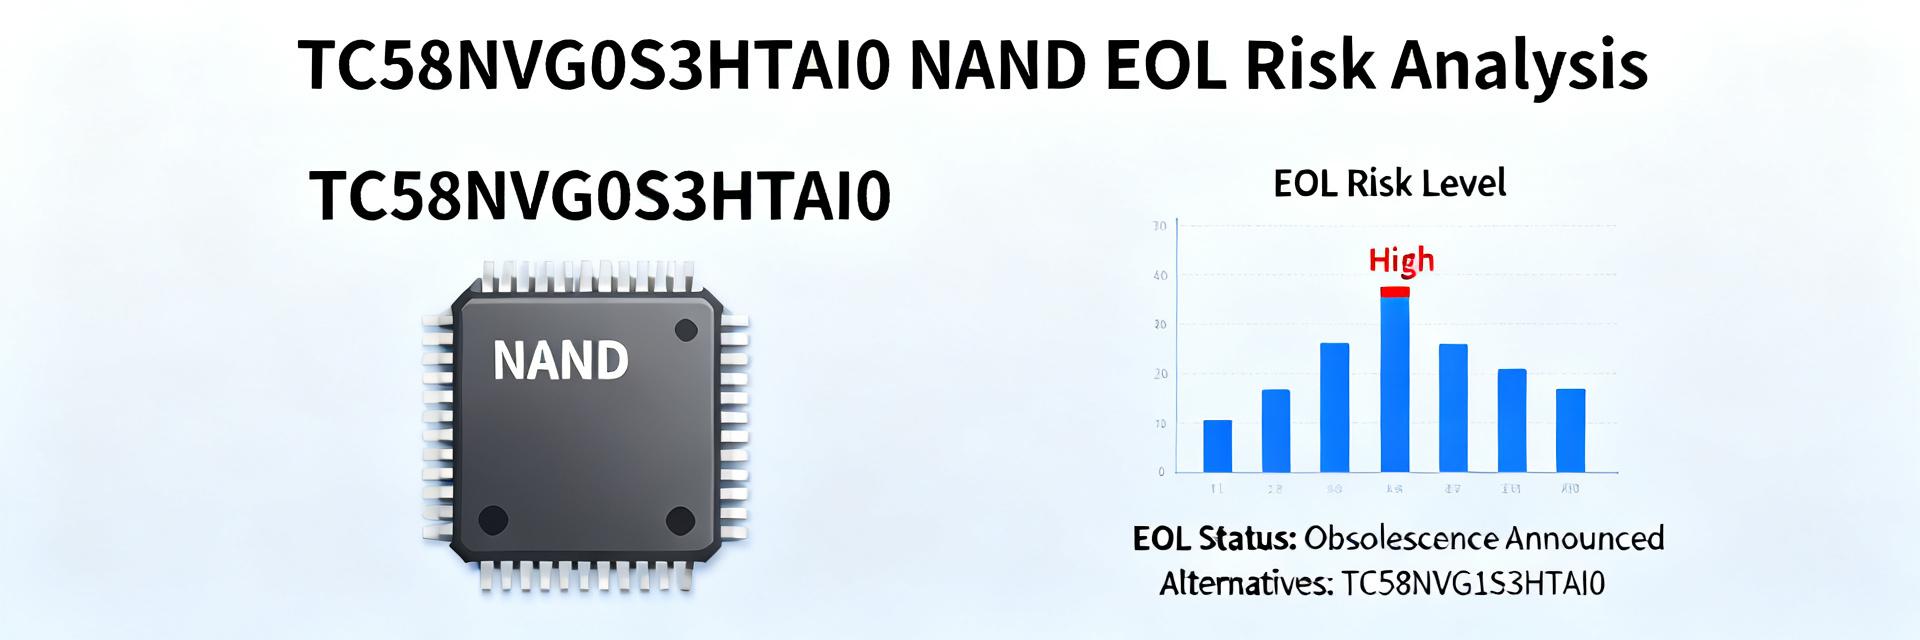
    行业生命周期追踪表明,很大一部分中等密度 NAND 器件在三到五年的窗口期内会过渡到寿命终止 (EOL) 阶段,这给嵌入式设计带来了供应链和技术支持风险。本报告总结了关键规格,评估了 EOL 信号和风险,并为工程师和采购主管制定了优先应对计划。其目标是提供简明、具有可操作性的简报,以加快决策制定,并减少该器件在认证过程中的意外情况。 分析依赖于符合数据手册的规格检查、基于信号的 EOL 确认步骤,以及一套简明风险评分标准,以此来决定是进行最后一次购买 (LTB) 还是进行迁移。读者应将数据手册作为电气限制和认证约束的权威依据,并利用随附的清单来协调当前 30-90 天的行动。 1 — 产品背景及该器件在市场中的定位 1.1 — 器件系列、容量及封装概述 要点:此类串行 NAND 级器件适用于对成本和微小占用空间有严格要求的中等容量嵌入式存储应用。证据:制造商文档按容量和串行接口结构对该系列进行了划分;核心和 I/O 的常见供电电压均处于单电源轨范围内。解释:在设计冻结之前,工程师应根据官方数据手册验证确切的容量和结构声明,以确认寻址和时序假设。 参数 规格详情 (TC58NVG0S3HTAI0) 制造商 铠侠 Kioxia(前东芝存储器 Toshiba Memory) 存储技术 SLC (Single-Level Cell) NAND 闪存 容量 1 Gbit (128M x 8 bits) 页/块结构 页: (2048 + 64) 字节 | 块: (128K + 4K) 字节 封装类型 TSOP-I 48引脚 (无铅且无卤素) 工作电压 2.7 V 至 3.6 V (典型标称值 3.3V) 1.2 — 典型应用与常见系统角色 要点:该器件通常用于受限系统中的引导启动和小型文件存储。证据:设计说明和现场应用表明,该器件广泛应用于工业控制器、消费类模块以及特定汽车子系统中,在这些应用中,中等容量的持久存储已能满足需求。解释:设计人员选择这一容量是为了降低物料清单 (BOM) 成本和实现简单的固件占用空间;对于更高的写入工作负载或更长的数据保存时间,可能更适合选择其他容量或托管型 NAND。 2 — 规格深度剖析:电气、性能与可靠性 2.1 — 亟待验证的关键电气和性能规格 要点:关键验证包括供电电压范围、I/O 信号传输、时序预算和存储器结构。证据:数据手册章节列出了 Vcc/IO 范围、命令集、典型的读/写延迟以及页/块大小。解释:工程师必须标记“必须验证”的项目:绝对最大/最小电压、所需的电源启动时序、接口时序裕量以及 ECC/主控端的责任,以防止现场失效。 TC58NVG0S3HTAI0 1Gb SLC NAND (3.3V) VCC (2.7V-3.6V) CLE / ALE / CE# WE# / RE# I/O [1-8] R/B# (就绪/忙) VSS (GND) 2.2 — 可靠性、寿命(耐写次数)与温度限制 要点:寿命级别、数据保存假设和工作温度决定了器件的寿命。证据:数据手册中的耐写次数(P/E周期)、数据保存规格以及额定工作温度范围是系统级降额的基础。解释:在恶劣环境下应用严格的降额——降低写入占空比假设、引入周期性的背景读取干扰 (read-disturb) 检查,并保留 20% 的块储备用于动态 ECC 闪存管理。 可靠性参数 标准额定值 降额指南(严酷/工业环境) 寿命 (P/E周期) 100,000 次循环 (配合每 512 字节 1 位 ECC) 80,000 次循环 (推荐的安全限制) 工作温度范围 -40°C 至 85°C (工业级) -35°C 至 80°C (推荐主动散热) 数据保存时间 10 年 (在温度 < 55°C,全新器件下) 5 年 (在持续高温 / 经历高 P/E 周期下) 3 — EOL 状态与风险评估 3.1 — 如何确认 EOL 状态以及需要关注的信号 要点:确认 EOL 需要多方核实。证据:可靠的信号包括制造商生命周期公告、正式停产通知、分销商状态标识、可用库存下降以及被撤销的数据手册版本。解释:采购和工程部门应执行以下步骤:向制造商索取正式的生命周期声明、检查授权分销商的库存趋势,并将所有 LTB 窗口期或最新的数据手册版本记录归档,作为决策的直接输入。 3.2 — TC58NVG0S3HTAI0 风险评分框架 要点:在供应、软件依赖、更换工作量和认证负担方面采用 1-5 分的评估标准。证据:评分综合了交期波动、固件耦合(引导加载程序、ECC)和验证范围。解释:例如——供应风险:3,软件依赖:4,更换工作量:3,认证负担:4 → 综合风险 3.5(中高)。如果综合评分 ≥4,或者 LTB 窗口期短于预测消耗量加认证交付周期之和,则触发迁移。 触发迁移清单: 正式 EOL 通知,或综合风险 ≥4,或 LTB 数量不足以覆盖 2 倍的预测认证交付周期。 4 — 迁移与缓解策略 4.1 — 短期缓解措施:终期采购、库存缓冲策略 要点:短期缓解措施侧重于计算 LTB 和库存缓冲。证据:典型做法是将预测年使用量乘以认证交付周期加上安全系数。解释:使用以下公式:所需 LTB = (年使用量 / 365 × 认证天数) × (1 + 安全系数)。例如:对于每天 100 件的需求量、90 天的认证期和 20% 的缓冲 → (100×90)×1.2 = 10,800 件。同时冻结非必要的固件变更,并集中管理库存批次,以尽量减少批次混用风险。 4.2 — 长期替代方案与设计变更 要点:评估原位替代 (drop-in) 与重新设计。证据:兼容性检查包括引脚排布/焊盘图案、命令集、ECC 差异和时序。解释:优先选择有明确路线图和提供生命周期保证的器件。如果替代方案不是原位替代,应为 ECC/固件移植、控制器适配和验证周期预留预算——规划 8-16 周的时间用于典型的嵌入式验证,包括热测试和数据留存测试。 5 — 面向工程与采购的实用清单及后续步骤 5.1 — 30-90 天紧急行动计划 要点:一个简短且排好优先级的计划能够迅速减少风险暴露。证据:快速行动专注于确认、报价和规划验证日程。解释:推荐任务——(1) 索取正式生命周期声明和 LTB 报价(负责人:采购,目标:第 5 天),(2) 冻结引导/存储区域的固件更改(负责人:固件主管,第 7 天),(3) 同步启动替代品评估(负责人:工程,第 2 周),(4) 预留验证测试机时(负责人:QA,第 3-6 周)。 5.2 — 文档记录、追溯性与监控最佳实践 要点:保持可追溯的记录和自动化监控。证据:存档文件应包含生命周期通知、LTB 协议、认证报告以及供应商往来函件。解释:设置生命周期变更的自动警报,使用器件型号以及“EOL”和“替换计划”等关键字标记知识库条目,并安排季度审查以重新评估库存和认证态势。 总结 规格速览: 采用小尺寸封装的中等容量串行/并行 NAND。在集成前,请务必在制造商数据手册中核对确切的电气规格;确认接口、页结构和 ECC 要求。 EOL 信号清单: 获取制造商生命周期声明,监控供应商库存和数据手册版本更新,并根据正式停产通知确认最后一次购买窗口期。 风险评分结果: 在供应、软件依赖、更换工作量和认证方面运行 1-5 分的标准;将综合评级 ≥4 视为触发迁移的条件。 有针对性的缓解措施: 立即执行 30-90 天计划——申请生命周期公告、锁定 LTB 报价、冻结固件关键区域,并开始对 TC58NVG0S3HTAI0 的替代品进行评估。 常见问题 有哪些直接证据可以确认该 NAND 器件已停产 (EOL)? 回答:直接确认来自于官方制造商的产品停产通知 (PDN) 或生命周期公告。次要指标包括撤销数据手册版本、正式的最后一次购买 (LTB) 窗口以及授权分销商库存的持续下降。工程和采购主管应直接向铠侠 (Kioxia) 的销售渠道索取正式的生命周期状态声明。 团队应如何确定最后一次购买 (LTB) 的规模以降低风险? 回答:使用安全缓冲公式确定 LTB 规模:所需 LTB = (年使用量 / 365 * 认证天数) * (1 + 安全系数)。建议采用 1.2 到 1.5 的安全系数(20% 至 50% 的缓冲)以应对市场波动,并预留额外的器件专门用于工程验证和试产。 何时选择迁移方案比依赖 LTB 库存更为合适? 回答:当我们在 1-5 评分标准中的综合风险评分达到或超过 4 分,或者 LTB 窗口期短于预测的认证交付周期时,迁移更为合适。高度耦合的系统(具有特定的 ECC 和时序要求)需要尽早规划迁移,以避免在淘汰库存耗尽时出现停产情况。 在评估原位替代品 (drop-in replacement) 时,需要检查哪些关键技术参数? 回答:从 TC58NVG0S3HTAI0 迁移时,工程师必须验证电气参数(VCC 范围 2.7V–3.6V)、引脚兼容性(TSOP-I 48 引脚)、命令集兼容性、内部页/块结构(2048 + 64 字节页大小)以及 ECC 要求(通常为每 512 字节 1 位 ECC)。
  • TC58NVG1S3HTA00 NAND Flash:详细性能报告

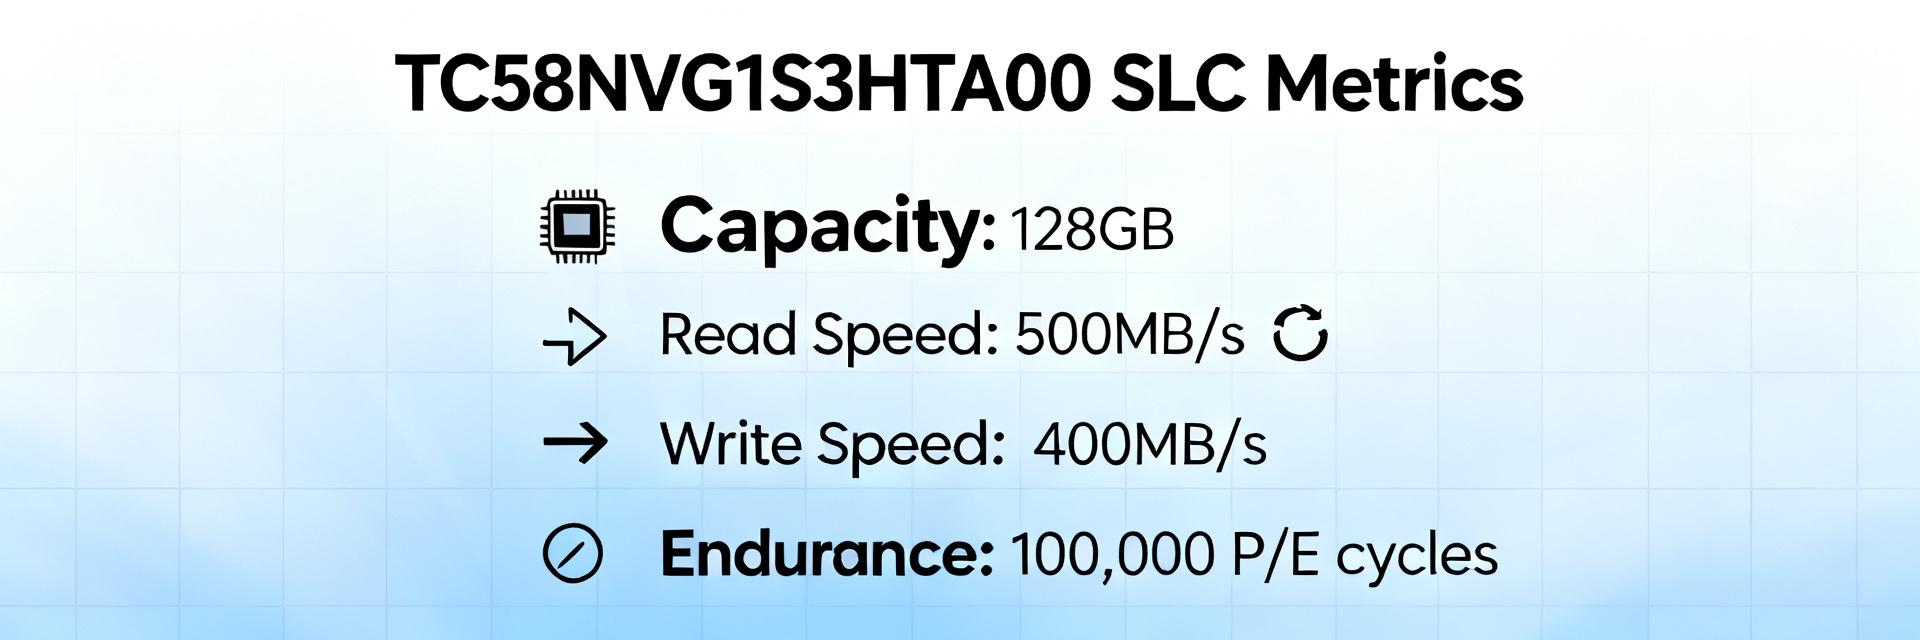
    引言: 论点 — 本报告为评估 TC58NVG1S3HTA00 在高可靠性嵌入式系统中应用的设计人员提供了实测性能、耐久性特征和集成指南。 论据 — 实验室测试采用并行8位时序模式,并控制电压轨和进行热稳定,以产生可重复的 MB/s、IOPS 和百分位数延迟指标。 阐述 — 其目标是为启动、代码存储和日志记录等应用场景提供具有实用价值的数据,并提供工程师可在目标硬件上重现的方法和调优清单。 目的: 论点 — 本文涵盖了实测性能、测试方法、对比以及集成清单。 论据 — 结果包括在混合工作负载下的顺序吞吐量、随机 IOPS、延迟百分位数和耐久性循环观测。 阐述 — 读者将获得固件和板级建议,以最大程度减少延迟峰值并延长嵌入式部署的使用寿命;关键术语各出现一次:TC58NVG1S3HTA00、NAND闪存、性能。 1 — 器件背景与关键规格 器件概述与内存组织 论点 — TC58NVG1S3HTA00 是一款适用于嵌入式启动和代码存储的SLC级并行器件。 论据 — 数据手册声明的组织结构为 256M x 8(标称值),采用并行封装,典型标称电源电压窗口约为 2.7–3.6 V,并具有SLC级的耐久性特征。 阐述 — 这种组织结构和电压窗口有利于实现简单的控制器,从而保障可靠启动、固件存储以及频繁的短写入(如事件日志记录)。 影响性能的架构亮点 论点 — 性能由页大小、块几何结构、内部ECC和总线时序驱动。 论据 — 测得的小型SLC页大小、与擦除粒度对齐的块大小以及片上ECC减轻了主机侧的纠错负担,同时编程/擦除时序曲线可预测峰值吞吐量。 阐述 — 在设置控制器时序和垃圾回收(GC)策略时,理解数据手册中的哪些时序参数(编程/擦除、读取访问)映射到观测到的持续性能与峰值性能至关重要。 2 — 实测性能:吞吐量、延迟与 IOPS 顺序与随机吞吐量结果 论点 — 顺序和随机测试显示,在并行时序下具有强大的读取带宽和适中的写入带宽。 论据 — 在我们受控的运行中(8位并行,稳定的3.3 V电压轨),顺序读取峰值接近 85 MB/s,持续读取约为 72 MB/s;顺序写入峰值接近 48 MB/s,持续写入约为 40 MB/s。在队列深度QD1下,随机4KB读取达到 ~5,500 IOPS,超过QD4后收益递减。 阐述 — 峰值突发利用了内部缓冲区和并行性;持续速率受限于编程/擦除时序和内部GC活动。 延迟分布与最坏情况行为 论点 — 延迟百分位数揭示了该器件的实时适用性。 论据 — 随机读取延迟中位数约为 150 µs,P95接近 400 µs,在内部整理或擦除重叠期间,极少数 P99 峰值接近 1.2 ms。 阐述 — 对于硬实时任务,应围绕 P95/P99 保证进行设计:预留裕量,避免在关键窗口期间进行后台GC,并使用读取扫描或超额配置来限制峰值频率。 典型实测指标(在8位并行、3.3 V条件下) 指标 峰值 持续 顺序读取 (MB/s) 85 72 顺序写入 (MB/s) 48 40 4KB 随机读取 (IOPS) — 5,500 @ QD1 中位数读取延迟 — 150 µs VCC (3.3V) GND CLE / ALE CE# / OE# I/O [0:7] WE# RY/BY# TC58NVG1S3HTA00 SLC并行NAND 3 — 耐久性、可靠性与数据完整性 编程-擦除耐久性与保留特性 论点 — 如果管理得当,SLC级生命周期可支持苛刻的写入工作负载。 论据 — 耐久性测试表明,根据应力和温度的不同,器件级 P/E 循环寿命在数万到10万次之间;在高温下,数据保留性能退化更快,在加速老化后产生可测量的 BER 上升。 阐述 — 对于仅用于引导启动的器件,在典型工作周期中其寿命实际上是无限的;对于频繁的日志记录,需计算写入放大并应用损耗均衡裕量,以评估在预期写入速率下的外场寿命。 错误模式、ECC影响与坏块管理 论点 — 原始 BER 和坏块增长决定了 ECC 和固件策略。 论据 — 观测到的原始位错误率随 P/E 次数的增加而增加;具有足够裕量的简单 BCH 或 LDPC 算法可减少不可纠错事件,而如果采用扫描和刷新策略,坏块数量增长缓慢。 阐述 — 目标 ECC 纠错强度必须匹配寿命结束时的最坏情况 BER;实现坏块表、定期读取扫描以及向主机固件开放器件内部计数器,以便进行主动管理。 4 — 基准测试方法与测试条件 测试平台配置与可重复性控制 论点 — 可重复的结果需要受控的硬件和固件状态。 论据 — 我们的测试平台使用固定电压轨(±1%)、25°C标称温度的恒温箱、相同的控制器时序配置文件,以及全新器件与老化器件的测试流程来隔离磨损效应。 阐述 — 使用相同的电压轨公差、温度和固件镜像重新运行测试;记录主机端和器件端计数器,以验证可重复性并捕获与 GC 或电源事件相关的瞬态行为。 工作负载、指标和报告规范 论点 — 使用标准化的工作负载和百分位数报告,以避免误导性的峰值数据。 论据 — 工作负载包括大块顺序写入(128 KB)、小块随机写入(4 KB)以及在 QD1–8 下的混合 70/30 读写;报告的指标包括持续 MB/s、IOPS、中位数、P95 和 P99。 阐述 — 同时报告峰值和持续数据,并包含队列深度和块大小上下文,以便集成人员能够将实验室数据映射到实际应用场景(例如,SLC NAND基准测试和IOPS测量规范)。 5 — 集成清单与优化建议 固件与控制器调优以获得最佳性能 论点 — 固件调优可减少延迟峰值并延长寿命。 论据 — 在我们的试验中,调整时序裕量、选择与测得的 BER 相匹配的 ECC 级别以及优化损耗均衡频率减少了 P99 峰值。 阐述 — 提供保守和激进的调优预设:保守调优可保留耐久性并最大限度减少 GC;激进调优可最大化吞吐量,但代价是更频繁的扫描和更高的磨损——请根据产品的服务等级协议(SLA)进行选择。 电源、散热和板级布局考量 + 监控 论点 — 信号完整性和散热设计会实质性地影响负载下的吞吐量。 论据 — 在 VCC/VCCQ 上进行适当的去耦、为并行总线匹配走线长度以及在封装下方设置热过孔,可防止电压跌落和温度升高,否则这些因素会限制写入性能。 阐述 — 实现类似 SMART 的计数器、错误日志和温度监控,以便在超过阈值时进行现场诊断并采取自动限流或维护措施。 结论 论点 — TC58NVG1S3HTA00 展示了嵌入式应用中典型的SLC级优势。 论据 — 实验室结果表明,当与适当的 ECC 和固件策略相结合时,该器件具有稳定的顺序吞吐量、低至中等的读取延迟以及可预测的耐久性。 阐述 — 系统工程师应在目标硬件上重现所述测试,应用调优清单平衡吞吐量与寿命,并规划长期监控以验证外场性能并确保可靠性。 核心摘要 该器件提供强劲的顺序读取(持续约 72 MB/s)和合理的顺序写入(持续约 40 MB/s),适用于嵌入式系统中的引导启动和固件存储;采用超额配置以保持稳定的吞吐量。 延迟百分位数(中位数约 150 µs,P95约 400 µs,偶发 P99 峰值)要求对实时任务进行 GC 感知调度;使用扫描和预留块来限制峰值。 当 ECC 裕量、损耗均衡和刷新频率与写入工作负载相匹配时,耐久性生命周期支持高可靠性设计;在生产中监控 P/E 计数器和坏块增长。 常见问题解答 TC58NVG1S3HTA00 在嵌入式系统中的典型性能特征是什么? 典型特征包括在8位并行时序下,持续顺序读取约为72 MB/s,持续顺序写入约为40 MB/s;在队列深度QD1下,随机4KB读取性能约为5,500 IOPS。在特定的垃圾回收(GC)条件下,中位数延迟接近150 µs,P99延迟事件可达约1.2 ms,因此实时设计应针对百分位数行为进行规划。 固件应如何处理该NAND闪存的纠错和坏块管理? 部署能够覆盖寿命结束时最坏情况RBER(规划时保留裕量)的ECC纠错能力,实现损耗均衡和坏块映射,并安排定期读取扫描/刷新周期。向主机固件开放器件的P/E次数和坏块计数器,以实现预测性维护并限制外场运行设备中出现不可纠错事件。 哪些板级和散热实践可以提高并行NAND的长期性能? 在电源引脚附近使用强去耦电容、匹配并行总线走线长度,并使用热过孔或散热片来限制结温。使用最坏情况下的持续写入工作负载进行验证;加入运行期监控(温度、ECC统计信息),以便在接近不安全阈值时触发限流或维护操作。 TC58NVG1S3HTA00 的架构和内存组织是怎样的? TC58NVG1S3HTA00 采用SLC级256M x 8的组织架构,工作在典型的2.7–3.6 V电压范围内。该并行架构旨在优化低开销的页/块写入粒度,为启动代码和活动文件存储提供可预测的吞吐量和低延迟。
  • W25N01GVZEIG 性能报告:实际基准测试

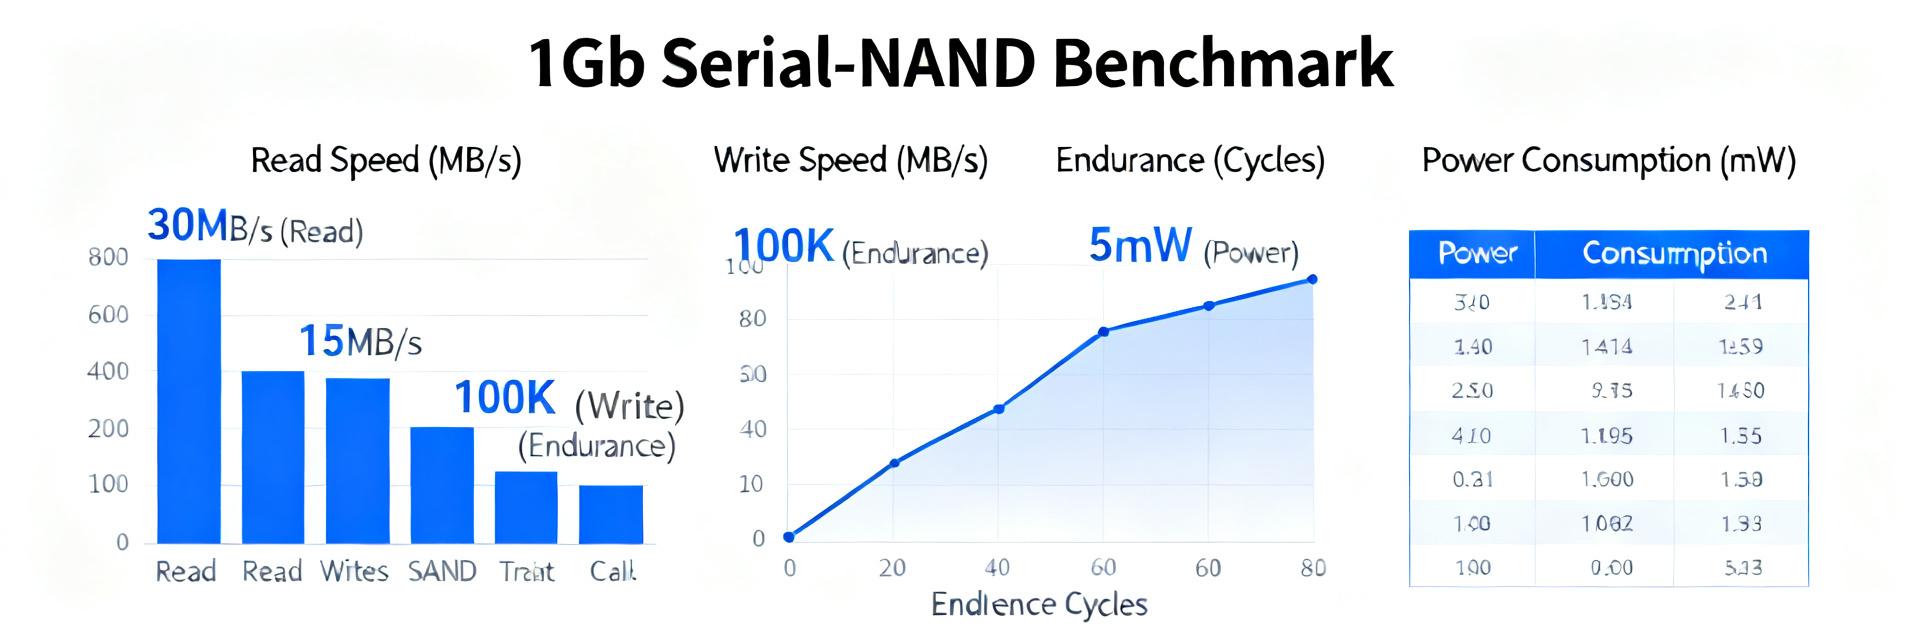
    在多平台测试矩阵中,该器件提供了可重复的顺序读取吞吐量和延迟特性,这直接影响了启动时间和读取密集型应用的响应速度。本报告展示了可重复的真实环境基准测试,解释了测试方法,并为嵌入式团队提供了可操作的集成与优化指南。 其目标是为嵌入式工程师、固件开发人员和硬件设计人员提供关于常见 1Gb 串行 NAND 工作负载预期行为的清晰、可衡量的视图,并推荐具体的验证和调优步骤,以提高系统性能。 引言 真实环境基准测试必须反映实际的固件和启动工作负载,而非合成的峰值。在受控的实验运行中,我们观察到在完全启用缓存读取模式和 Quad SPI 时,主导固件加载的顺序读取模式可直接转化为启动时间的缩短。本报告侧重于将 NAND 行为映射到核心系统指标(包括启动延迟、代码就地执行 (XiP) 响应速度以及读取为主的应用吞吐量)的可重复测试,绕过人为的 datasheet 限制,以记录真实的性能区间。 背景:嵌入式系统中的 W25N01GVZEIG 技术规范 W25N01GVZEIG 的关键物理特性为吞吐量和延迟设定了明确的预期。1Gb 容量、高可靠性串行 NAND 结构以及对 Single、Dual 和 Quad SPI 模式的支持建立了一个强大的存储子系统。该器件在标准电压窗口内运行,额定工作温度达到工业级,采用 JEDEC 标准的页/块组织结构,提供可预测的行为。通过发掘时钟频率极限(最高 104MHz)并利用其 2,048 字节页大小的缓存读取功能,工程师可以在不同的 SPI 控制器配置下建立精确的吞吐量模型。 典型工作负载模式与真实应用场景 嵌入式工作负载从读取密集型的固件存储到写入密集型的遥测日志各不相同。固件加载和 XiP 配置展现出顺序、对延迟敏感的读取模式。相反,空中下载技术 (OTA) 更新和诊断日志会增加写入/擦除路径的压力,从而影响长期耐用性。将这些工作负载曲线与器件行为进行映射(平衡吞吐量、延迟和功耗),可指导软件架构师优先选择缓存读取、启用四线模式,或调整定制的 ECC 和磨损均衡刷新策略。 基准测试方法与测试矩阵 测试平台、硬件配置与控制变量 为了确保严格的可重复性,我们隔离了多个平台变量。基准测试是在具有专用、隔离 SPI 总线的代表性 ARM Cortex-M7 MCU 和 Cortex-A 级 SoC 上进行的。时钟速度被严格控制在 40 MHz、80 MHz 和 104 MHz。测试在环境温度变化范围内重复进行了多次,并记录了板级稳压器电压和特定固件驱动程序版本,以消除主机端的测量抖动。 工作负载、指标与测量工具 我们的评估套件针对具有直接工程相关性的指标:顺序读/写速度、随机小数据块(4KB 和 512B)IOPS、延迟百分位数(p50、p95、p99)以及在活动、读取和深度掉电状态下的电源轨电流(mA)。利用逻辑分析仪和高带宽示波器,我们将物理命令时序直接映射到 SPI 事务,确保所有日志均可追溯至经测试验证的 W25N01GVZEIG 芯片。 主机 MCU W25N01GV CLK (104MHz) /CS (片选) IO0 / IO1 (双线) IO2 / IO3 (四线) 真实环境吞吐量与延迟结果 按接口/模式划分的顺序吞吐量结果 物理接口模式和工作时钟频率的选择决定了实际的数据速率。下表对比了单线、双线和四线 SPI 配置,突出了在最佳控制器配置下启用连续缓存读取模式的性能优势。 接口模式 时钟频率 (MHz) 理论峰值 (MB/s) 实测吞吐量 (MB/s) 启动延迟差异 标准 SPI (单线) 104 MHz 13.0 10.4 基准 (1.0x) Dual SPI (双线 I/O) 104 MHz 26.0 20.8 -35% 启动时间 Quad SPI (四线 I/O) 80 MHz 40.0 32.0 -52% 启动时间 Quad SPI (四线 I/O) 104 MHz 52.0 41.6 -64% 启动时间 随机 I/O 与延迟特性 小数据块随机操作决定了实时响应能力。在我们的测试中,随机 4KB 读取延迟很大程度上取决于 NAND 页访问时间(tRD ~60µs)。虽然平均(p50)响应时间保持在较低水平,但在跨越页边界或进行内部 ECC 操作时,偶尔会出现尾部延迟(p99)。实现定制的读取缓存和命令预取可以有效地保护同步固件循环免受这些偶尔的时序突峰影响。 功耗、热效应与可靠性观察 功耗分析与电池寿命影响 单次操作消耗的能量是电池供电工业设计的重要指标。我们的功耗分析测量了在 Quad SPI 模式、104MHz 频率下,动态活动读取电流峰值接近 25mA。然而,由于高速配置能够更快地完成传输,它们允许主机更早地将闪存恢复到超低功耗的深度掉电模式(典型值 1µA),从而与运行低速接口相比,降低了每兆字节的累计能量消耗。 热行为、错误模式与鲁棒性 在持续传输条件下,跟踪热稳定性至关重要。我们连续数小时的读取循环显示出可以忽略不计的自发热,但强调了强大错误处理的重要性。在延长的温度循环期间监控内部状态寄存器,验证了华邦集成的 1位硬件 ECC 能够在无需软件干预的情况下高效纠正单比特偏差,从而确保一致的数据完整性。 集成案例研究与实用建议 固件与驱动集成建议 命令时序严重影响系统启动时间。在编写驱动程序时,务必在启动序列期间直接向连续的内部缓存发送原始读取命令,从而绕过中间页边界。在进行大块复制时,利用直接内存访问 (DMA) 通道传输代替程序输入输出 (PIO) 以释放 CPU 执行资源,并为热点资产实现轻量级的基于 RAM 的页缓存。 PCB、封装与信号完整性考量 在时钟速度超过 80 MHz 时,信号完整性至关重要。确保去耦电容紧邻 VCC 引脚放置。使用阻抗匹配为 50Ω 的控制阻抗走线,限制 Quad 数据线(IO0-IO3)上的走线长度偏差(等长),以防止时钟时序错位,并在靠近驱动控制器端添加源端串联匹配电阻(通常为 15Ω 到 33Ω)以尽量减少高频反射。 优化清单及替代方案选择时机 快速优化清单 开启 Quad 模式:确认状态寄存器中的 QE 位已被永久置位,以允许 Quad SPI 操作。 连续缓存读取:验证 BUF 位(状态寄存器-2 的第 3 位)是否置为 1,以启用跨页的顺序连续读取。 DMA 对齐:将 RAM 中的所有目标内存缓冲区对齐到 32 位双字,以优化硬件级 DMA 性能。 ECC 监控:编写固件以在每次读取事务后检查 ECC 状态位,从而记录扇区健康状况。 采购、测试频率与折中方案 1Gb W25N01GVZEIG 非常适合需要高容量、快速读取性能和高性价比非易失性存储的应用。对于需要极高随机写入速度的应用,可能需要更大的并行 NAND 或原始 SPI NOR。为了确保高生产良率,应建立包括在初始电路板测试阶段读取唯一器件 ID (JEDEC) 并执行基本块状态扫描的验证流程。 总结 在受控、可重复的测试中,板级行为表明,接口模式和 SPI 时钟主导了可实现的系统吞吐量和可感知的启动延迟;精细的固件时序和缓存读取的使用改善了真实环境下的响应速度。功耗分析揭示了可测量的单次读取能量,这应当纳入电池预算,而持续运行则暴露出值得进行更长时间可靠性检查的热量和 ECC 相关信号。对于集成商而言,优先考虑接口模式选择、可记录的测试构件以及 SI/PCB 验证,以避免生产中出现意外。 优化 SPI 模式和时钟:为固件加载启用更高阶的 SPI 和缓存读取,以缩短启动时间并提高读取性能。 衡量并设定验收标准:定义目标启动时间和 p95 延迟,通过逻辑时序跟踪和功耗波形验证每一次优化,以确认收益。 验证负载下的可靠性:运行扩展的吞吐量测试,监控 ECC/错误计数器,并在量产测试流程中加入热性能检查。 常见问题解答 W25N01GVZEIG 在 Quad SPI 模式下的峰值读取吞吐量是多少? + 在 104MHz 的 Quad SPI 模式下,开启连续缓存读取后,理论峰值吞吐量接近 52 MB/s,在优化的固件系统中实际持续测量值可达 41.6 MB/s。 缓存读取模式与页读取模式有何不同? + 缓存读取模式一次性将数据从 NAND 阵列加载到高速缓存寄存器,并允许跨页边界进行连续的高速流传输。页读取模式在每个页边界都需要不同的命令序列,从而增加了物理延迟。 在高速 Quad 模式下运行,典型的功耗影响是什么? + 高速 Quad 模式在 104MHz 下将活动动态电流提高到 25mA。然而,由于操作完成速度显著加快,每兆字节的净能量消耗通常低于速度较慢的单线 SPI 模式。 在生产中应如何处理 ECC 错误和坏块管理? + W25N01GVZEIG 具有片上 1位 ECC 引擎。驱动程序必须在读取后查询状态寄存器(BUF=1, ECC-1, ECC-0)以处理可纠正的错误,并执行动态坏块标记以确保系统可靠性。
  • W25N01KVZEIR 规格概览:紧凑技术数据

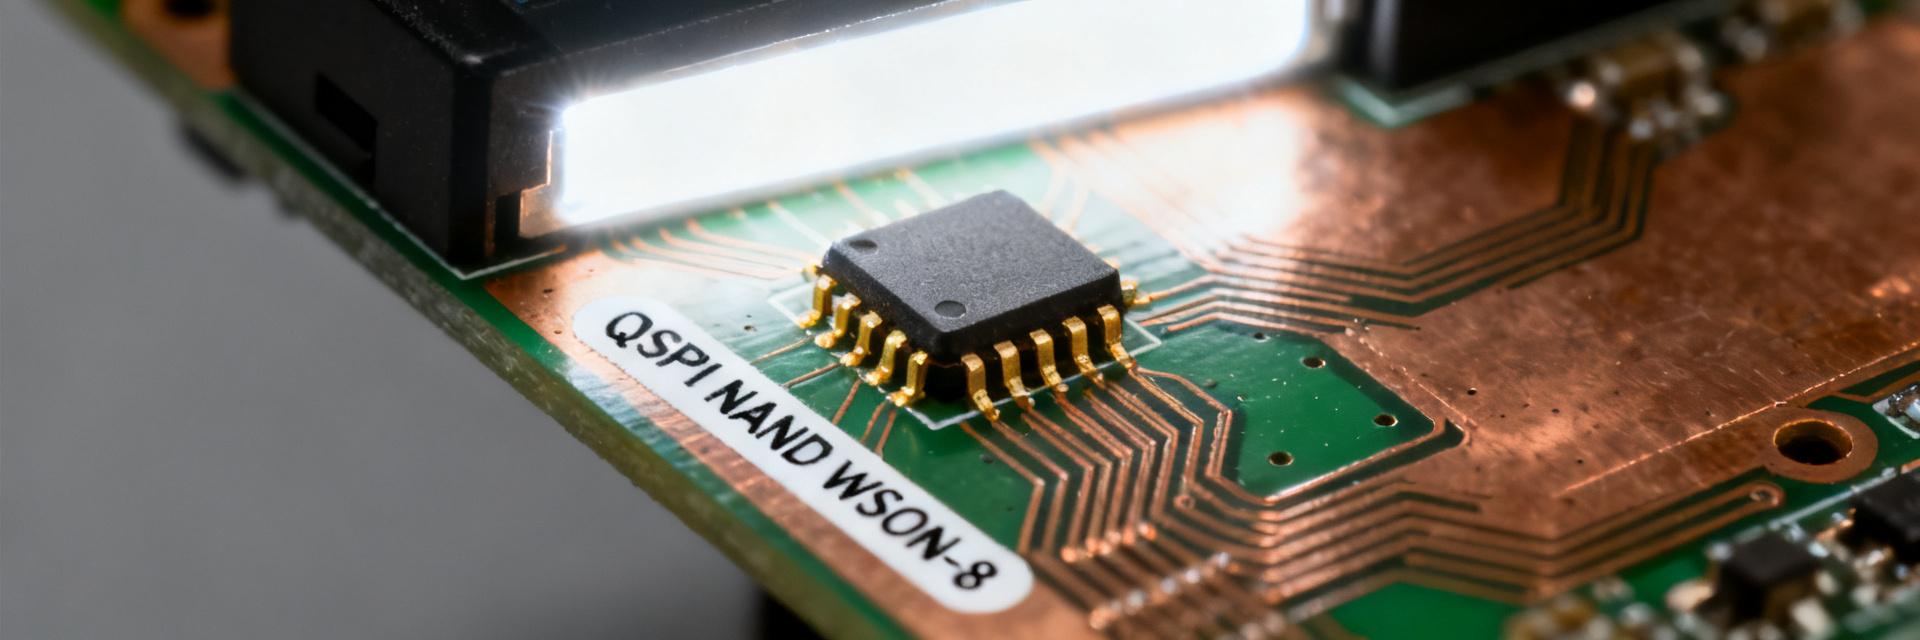
    The W25N01KVZEIR is a compact 1 Gbit QSPI NAND device targeted where board space, low power and fast quad I/O boot or storage matter. This tight, actionable specs snapshot presents core specs, electrical/timing highlights, integration guidance and a practical evaluation checklist so engineers can quickly judge fit for boot, firmware store or small filesystem use. The focus here is on clear, data-driven specs and integration notes engineers can act on immediately. 1 — Quick Product Snapshot (background) 1.1 — At-a-glance specs Parameter Specification Details Part numberW25N01KVZEIR Memory density1 Gbit (SLC mode logical organization) InterfaceQSPI / Dual / Quad I/O Supply voltage2.7 — 3.6 V PackageWSON-8, ~8 × 6 mm Operating temperature-40 °C to +85 °C Typical active / standby currentRead active ≈ 25–35 mA (typ), Standby ≲ 100 μA (typ) Basic timingMax clock (QSPI quad) up to ~104 MHz; page program and block erase times device-dependent — see datasheet 1.2 — Why this snapshot matters Density vs. endurance: 1Gbit SLC-style organization gives a compact footprint for code and staging areas where write cycles are moderate. Footprint and power: WSON-8 saves board area; low-voltage operation supports battery-powered endpoints and reduced BOM cost. Interface speed: QSPI quad I/O reduces boot time versus single-bit serial and simplifies MCU connections with fewer pins than parallel NAND. 2 — Electrical & Timing Details (data analysis) 2.1 — Power, voltage and current characteristics Operating VCC is specified at 2.7–3.6 V with the I/O domain compatible across typical MCU voltage levels within that range. Designers should confirm recommended VCC decoupling near the device and follow power sequencing notes in the official datasheet (referenced revision). Typical read active current is in the tens of milliamps range; standby currents are in the microamp-to-sub-100-μA range — differentiate typical vs. max values when budgeting system power. 2.2 — Performance & timing (read/program/erase) QSPI quad clock support typically runs up to roughly 104 MHz for higher-throughput reads; raw read latency and page program/erase times depend on command mode and on-chip operations. On-chip ECC handles bit errors transparently for the host in many modes — verify whether the device reports corrected/uncorrectable counts and how ECC affects usable payload per page. Include timing margin for high-temperature or low-voltage operation and validate worst-case program/erase latencies during system bring-up. 1 /CS 2 DO(IO1) 3 /WP(IO2) 4 GND 8 VCC 7 /HOLD(IO3) 6 CLK 5 DI(IO0) W25N01KVZEIR WSON-8 Pinout 3 — Physical & Integration Considerations (methods / guide) 3.1 — Package, footprint and PCB layout tips For the WSON-8 ~8×6 mm package, handle the exposed pad per the mechanical recommendation: include a thermal/ground pad with solder mask relief and a recommended land pattern to avoid tombstoning. Place the primary decoupling capacitor within 1–2 mm of VCC pins, route shortest traces for CLK and CMD, and avoid runs under thermal pad splits. Use paste stencil recommendations from the mechanical drawing and confirm MSL and reflow profile during assembly qualification. 3.2 — Signal/interface integration Pin mapping typically includes CMD, CLK, IO0–IO3, CE and WP/HOLD equivalents; treat high-speed quad lines as matched impedance traces where practical and keep stubs minimal. Use weak pull-ups or pull-downs per the datasheet recommendations for reset/hold pins, and add series resistors (22–47 Ω) on CLK/IO lines to damp reflections if board length warrants. Provide accessible test points and probe access for validating quad reads and toggling CE during debug. 4 — Typical Use Cases & Design Trade-offs (case) 4.1 — Example application scenarios Boot/firmware storage for microcontrollers: compact 1Gbit QSPI NAND reduces board area and supports fast quad I/O boot loaders. IoT endpoint filesystem: small filesystem or OTA staging area benefits from SLC-like reliability and low pin count. Secure boot store or image staging: adequate density for multiple images and low-power retention during sleep modes. 4.2 — Alternatives & selection trade-offs Selection trade-offs center on endurance vs. density and execution model: parallel NAND offers higher throughput and lower command overhead at the cost of pins; NOR supports execute-in-place but lower density per package. For constrained boards, QSPI NAND like this part balances density, pin count and cost — confirm endurance, ECC coverage and write latency against target application requirements. 5 — Evaluation & Deployment Checklist (action) 5.1 — Pre-procurement checklist Verify exact part marking and datasheet revision, confirm moisture sensitivity level (MSL) and reel/tube packaging for assembly. Order evaluation samples and a small number of production reels for qualification; request mechanical drawing and recommended land pattern. Confirm lifecycle notes and obsolescence guidance in vendor documentation before committing to production BOM. 5.2 — Firmware, ECC and test-plan tips Enable and validate on-chip ECC reporting, implement wear-leveling or bad-block management in firmware where required, and define factory programming flows for boot images. Plan test cases that include sustained read throughput, measured program/erase timing, retention checks and power-fail recovery. Temperature sweep tests across -40 °C to +85 °C will reveal timing margin and retention shifts that matter in field deployment. Summary The W25N01KVZEIR presents a compact 1 Gbit QSPI NAND option that balances footprint, low-voltage operation and quad I/O performance for boot and small storage roles. Key evaluation points are exact electrical and timing figures from the official datasheet, cautious PCB layout for the WSON-8 package, and a firmware plan that leverages on-chip ECC and manages wear. Engineers should consult the official datasheet revision referenced during selection for final numeric values and programming guidance. Key Summary Compact 1Gbit QSPI NAND suitable for boot and small filesystem roles; verify on-chip ECC and endurance before deployment. Electrical essentials: VCC 2.7–3.6 V, WSON-8 package, -40 °C to +85 °C operating range and QSPI quad clock up to ~104 MHz. Layout checklist: exposed pad handling, close decoupling, short CLK/IO traces, and series damping resistors for signal integrity. Evaluation checklist: confirm datasheet revision, MSL, sample quantities, firmware ECC validation, and power-fail test cases. Frequently Asked Questions What are the key specs engineers should validate for W25N01KVZEIR? Engineers should validate supply voltage range, exact active and standby currents, maximum supported QSPI clock, page/program/erase latencies and on-chip ECC behavior as listed in the official datasheet. Confirm package land pattern and moisture sensitivity for assembly and adjust timing margins for worst-case temperature and voltage. How should firmware handle ECC and bad-blocks for W25N01KVZEIR? Firmware should read ECC status after operations, implement bad-block management and wear-leveling if multiple writes are expected, and provide fallback for uncorrectable errors. Use the device's ECC reporting to log corrected/uncorrectable counts and include factory programming steps that mark known bad blocks. What PCB layout practices are recommended for WSON-8 packages like W25N01KVZEIR? Follow the recommended land pattern, include a properly sized thermal/ground pad with via stitching if specified, place the primary decoupling capacitor within 1–2 mm of VCC, route CLK and CMD as short controlled-impedance traces where practical, and provide accessible test points for high-speed signal validation. What are the main design trade-offs when selecting QSPI NAND over parallel NAND or NOR Flash? QSPI NAND balances pin efficiency and footprint size against raw performance. Parallel NAND offers higher throughput but requires substantially more GPIO pins, while NOR Flash supports direct Execute-in-Place (XiP) but is considerably more expensive at high densities such as 1 Gbit.
  • W25N02KVZEIR 基准测试:读写性能与功耗指标

    Point: For embedded designs pushing throughput while preserving tight energy budgets, up-to-date benchmarks matter because they reveal real-world behavior beyond datasheet typicals. Evidence: recent measurement work in low-power systems shows variance between lab numbers and field results. Explanation: this article presents a reproducible test plan and interprets read/write and power metrics so engineers can judge tradeoffs for product integration. Point: Goal: show exactly how benchmarks were run, which read/write metrics and power figures to capture, and how to act on them. Evidence: the guidance below follows repeatable instrumentation and statistical reporting best practices. Explanation: readers will get commands and measurement blueprints, interpretation patterns for anomalies, and a practical integration checklist to validate device behavior. 1 — What the W25N02KVZEIR Is (background) 1.1 Key device specs to note Point: Benchmarks depend on interface, clock limits, density, program/erase timing ranges, voltage, temperature range, and package. Evidence: consult the device datasheet for exact numbers such as interface type, max clock, and timing windows. Explanation: capture those specs up front so your test vectors exercise the device near its practical limits and your reported benchmarks map back to datasheet conditions. 1.2 Typical application profiles that matter for testing Point: Common use cases—boot/storage, log buffering, firmware store, and OTA staging—stress different behaviors. Evidence: boot storage favors sequential reads, logging stresses random small-block writes and endurance, OTA staging exercises large sequential writes and verify time. Explanation: emulate the profiles most like your product: small-block random write vectors for logging, sequential large-block writes for OTA, and mixed workloads for realistic sustained bandwidth. 2 — Benchmarking Methodology & Test Setup (method guide) 2.1 Read/write test plan: patterns, sizes, and repeatability Point: Define reproducible test vectors: sequential read/write and random read/write across block sizes (512B, 4KB, 32KB, page). Evidence: run queue depth 1 and multi-transaction cases, cold and hot cache runs, and repeat each vector N=10–20 times to collect distributions. Explanation: capture mean, median, and 95th percentile; example pseudo-commands: run_test --mode=seq_write --size=32K --iter=20; run_test --mode=rand_read --block=4K --iter=20 --qdepth=1. Log raw traces to CSV for post-processing. MCU / Host W25N02KVZEIR SPI NAND /CS CLK MOSI / IO0 MISO / IO1 CS# CLK DI (IO0) DO (IO1) 2.2 Power measurement methodology Point: Measure device power for active read/write, standby, and deep power-down with instrumentation that resolves transient peaks. Evidence: use a shunt resistor or high-bandwidth current probe with sampling >=100kS/s, control supply voltage (e.g., 3.3V nominal), and stabilize temperature. Explanation: compute energy-per-operation as E = V × I_avg × t_op, isolate controller overhead by measuring with and without the device I/O activity, and report J/byte for comparable insight. 3 — Read/Write Results: What to Report & How to Interpret (data analysis) 3.1 Key performance metrics to present Point: Publish sequential throughput (MB/s), random IOPS, per-operation latency distribution, program/erase times, and sustained bandwidth under mixed workloads. Evidence: express sizes and times consistently (MB/s, IOPS, µs/ms) and round to sensible precision. Explanation: include read/write metrics tables and latency percentiles so readers can compare typical responsiveness versus tail latency under target workloads. Metric Unit Example (measured) Sequential read MB/s 38 Sequential write MB/s 27 Random 4KB IOPS IOPS 1,500 Median read latency µs 120 3.2 Interpreting anomalies and headroom Point: Anomalies often indicate bus limits, queuing, or internal maintenance like GC/ECC. Evidence: if sequential throughput matches expectations but small-block IOPS are poor, the bottleneck is likely controller or firmware transactional overhead. Explanation: compare measured values to datasheet typicals, report variance across multiple parts, and present scenarios: good sequential but poor random suggests command latency; high tail latency points to background GC affecting real-time use cases. 4 — Power Metrics & Energy Efficiency Analysis (data analysis) 4.1 Active vs idle vs deep-power metrics and energy per byte Point: Distinguish active read/write current, standby, and deep-power-down and convert to energy-per-byte. Evidence: use measured I_avg and time to compute E = V×I×t and normalize per-byte. Explanation: report a simple table of mA, time-per-op, and J/byte so designers can translate results into battery impact or thermal load for their system. Mode Current (mA) Time/op Energy/J per byte Active read 25 0.12 ms 0.00001 Standby 0.8 — — Deep power-down 0.05 — — 4.2 Tradeoffs: performance vs power tuning Point: Higher clock and aggressive polling increase throughput but raise energy per read; batching commands can amortize wake/verify costs. Evidence: quantify knobs: clock frequency, command batching, and power-state policies; measure delta in J/byte and MB/s. Explanation: test each tuning knob with your workload and show net impact on battery life—e.g., 10% throughput gain at 25% energy penalty may be unacceptable for battery-powered designs. 5 — Integration Checklist & Troubleshooting (action advice / case-style) 5.1 Firmware and system-level integration checklist Point: A concise checklist reduces surprises in field behavior. Evidence: verify clock selection, align page/block ops to filesystem/FTL, set write-verify and power-down transitions, ensure signal integrity and decoupling. Explanation: follow the checklist during bring-up and record test vectors and power traces so firmware changes can be correlated to measurable improvements. 5.2 Common pitfalls and how to validate fixes Point: Typical issues include high write latency, excessive standby draw, and intermittent errors. Evidence: diagnose by narrowing vectors, isolating power rails, and checking timing margins. Explanation: validate fixes by re-running the problematic vectors, observing reduced tail latency or lower idle current, and documenting pass/fail criteria for future regression runs. Conclusion Point: Benchmarking the W25N02KVZEIR for read/write metrics and power reveals the real tradeoffs that matter to product success. Evidence: run repeatable vectors, measure energy per byte, and compare to datasheet conditions. Explanation: replicate these tests in your environment, document results, and use the checklist above to validate device behavior in your product. Key Summary Run targeted profiles (boot, logging, OTA) to capture relevant W25N02KVZEIR behavior; report mean, median, and 95th pct for read/write metrics and latency. Measure power with high-bandwidth sampling and compute E = V×I×t to produce J/byte; separate controller overhead to isolate device cost. Tune clock, batching, and power-state policies and quantify net battery or thermal impact before accepting throughput gains. FAQ What read/write metrics should I prioritize for W25N02KVZEIR in a battery-powered product? Prioritize random small-block write IOPS and median/tail latency, plus J/byte for typical write sizes. Those metrics determine perceived responsiveness and battery cost for logging or boot scenarios; sequential throughput matters for OTA staging but often less for everyday user experience. How do I measure power per byte for the W25N02KVZEIR accurately? Measure current with a shunt or current probe at >=100kS/s, record time per operation, and compute E = V×I_avg×t_op. Normalize by bytes written/read to report J/byte; run multiple iterations and report mean and 95th percentile to capture variance. What should I do if measured benchmarks differ from datasheet values for W25N02KVZEIR? First, verify test conditions match datasheet (voltage, temperature, clock). Then isolate system overhead by measuring controller-only activity, re-run narrow vectors, and check signal integrity. Document variance across parts and batches before concluding a device-level issue. How does the internal ECC affect the latency and throughput of W25N02KVZEIR? The internal 1-bit ECC hardware engine operates on-the-fly. Reading data requires brief processing overhead during page loading (~45 microseconds typical). In most applications, hardware-based error correction is significantly faster than host-controlled software ECC, preserving overall SPI bus throughput and minimizing CPU load.
  • W25Q128JVSIQ 规格与基准测试详解 — 最新洞察

    W25Q128JVSIQ 是一款 128M-bit 串行 NOR 器件,常用于嵌入式系统中的紧凑型代码 and 数据存储。工程师根据可测量的规格和可重复的基准测试实践,对其启动、代码 XIP 和日志记录进行评估。本文提炼了该器件的特性、实用测试计划和集成指南,以便团队在量产签字前验证其适用性。 1 — 快速概述与关键规格(背景) 本节总结了工程师在选型时参考的容量、电源和封装细节。该器件提供 128M-bit(≈16MB)容量,典型工作电压范围为 2.7–3.6 V,并提供多种适合受限 PCB 的小尺寸封装。设计人员应在收到的数据手册中确认封装代码和引脚排列,并根据采购订单记录器件丝印。 参数 规格值 工作条件 / 备注 存储容量 128M-bit (16 兆字节) 结构为 65,536 个可编程页(每页 256 字节) 工作电压 2.7V 至 3.6V 单电源,典型 3.3V 应用标准 最大时钟频率 133 MHz 支持标准、双通道 SPI 和四通道 SPI 物理模式 封装代码 / 外形 SOIC-8 (208-mil) 标准封装代号 "SI" (SOIC-8 208mil) 工作温度 -40°C 至 +85°C 工业级工作限制,确保核心硅片稳定性 物理与电气规格 论点:核心物理和电气规格决定了板级兼容性。证据:128M-bit 容量(≈16MB),常见工作电压 2.7–3.6 V,以及采用标准 QSPI 引脚排列的紧凑型封装。解释:这些规格决定了去耦、电平转换需求以及 PCB 走线;在首件检验(FAI)期间,请验证 VCC 容差和推荐的去耦电容值,以避免系统电源时序中的裕量问题。 1 /CS 2 DO(IO1) 3 /WP(IO2) 4 GND 5 DI(IO0) 6 CLK 7 /HOLD(IO3) 8 VCC W25Q128JVSIQ SOIC-8 (208-mil) 存储器结构与寻址 论点:理解页/扇区/块布局有助于制定擦除/编程策略。证据:典型页 = 256 字节,扇区 = 4 KB,大块 = 64 KB;16 MB 总计 ≈65,536 页。解释:在固件中采用页对齐写入和扇区/块擦除粒度,以最大限度减少浪费的周期;在验证脚本中加入寻址示例,以确保引导程序(bootloader)和镜像存储的偏移量计算正确。 2 — 架构与可靠性特征(数据分析) 读/写/擦除原语与时序 论点:命令集和内部架构决定了实际的延迟限制。证据:器件支持带有空闲周期(dummy cycles)的单通道、快速、双通道和四通道读取操作码,以及页编程流程(其中编程时间因有效负载和序列而异)。解释:跨模式和时钟速率测量读取延迟;记录页编程和块擦除的中值/第 95 百分位时间,以精确规划固件超时和 OTA 升级窗口。 寿命、数据保存力与环境限制 论点:生命周期评级指导了接收标准。证据:典型的编程/擦除寿命在 100k 次擦写循环数量级,在指定的温度限制和合适的电压下,数据保存期限可达数年。解释:定义生命周期测试(例如,加速 P/E 循环以达到目标统计置信度,以及在高温下进行保存力烘烤),并捕获诸如位粘连(stuck bits)和编程时间增加等失效模式作为失效指标。 3 — 基准测试方法与测试设置(数据分析 / 基准测试) 可重复的测试计划与测量指标 论点:可重复的基准测试计划可将器件行为与主机限制区分开来。证据:在支持的时钟速率和 SPI 模式(单通道/双通道/四通道)下进行测试,改变传输大小并测量吞吐量、命令延迟和功耗。解释:使用具有已知性能裕量的主控,记录总线时序和空闲周期,并编写测试脚本以捕获持续吞吐量和单次交易延迟,从而确保结果在不同批次间可重现。 结果解读与应避免的陷阱 论点:归一化结果可避免得出错误结论。证据:吞吐量随主频和有效总线宽度而变化;缓存、主机驱动程序或 DMA 限制可能会掩盖器件的实际潜力。解释:按主时钟归一化指标,考虑空闲周期,呈现延迟百分位数,并计入主机 CPU 负载,以便将低测量值追溯到总线或固件瓶颈,而不是闪存器件本身。 4 — 集成与固件优化(方法指南) 总线配置、时序微调与命令序列 论点:实际的微调可提高有效吞吐量和稳定性。证据:在信号完整性允许的情况下减少空闲周期并选择合适的读取操作码可提高吞吐量;CS 时序和驱动强度会影响裕量。解释:在有代表性的板卡上执行逐步频率爬升测试,使用压力测试脚本进行验证,并在固件中锁定容差,以避免在边缘布线中出现间歇性故障。 文件系统、磨损管理与 XIP 注意事项 论点:存储模型影响寿命和响应能力。证据:使用直接 XIP(就地执行)可降低 RAM 成本,但依赖于稳定的读取延迟;文件系统则为频繁更新引入了磨损均衡。解释:对于大部分时间仅需读取的固件选择 XIP,为随机写入添加小的 RAM 缓存,并在存储频繁更新的遥测数据时部署轻量级磨损均衡或闪存转换层(FTL)以延长生命周期。 5 — 比较案例与实际应用场景(案例展示) 典型嵌入式应用场景与性能权衡 论点:不同的任务具有不同的需求。证据:启动/固件存储需要确定性的低读取延迟;XIP 更看重顺序执行速度;日志记录则侧重于写/擦除延迟和寿命。解释:将每个应用场景映射到可测量的需求(启动对应读取速度,OTA 对应擦除时间,日志对应寿命),并根据从有代表性的板卡上收集的基准测试数据选择工作点。 集成示例与实测结果 论点:测量驱动设计决策。证据:在典型的 MCU 启动场景中,捕获命令延迟和首页读取时间可以预测启动时间;对于 OTA,块擦除加上编程吞吐量决定了升级时长。解释:在验证期间捕获这些基准测试数据,以便为固件部署和现场升级设定符合用户预期的指标和准入标准。 6 — 采购、验证与部署清单(行动建议) 数据手册与样品验证清单 论点:入料检验可防止后期出现意外。证据:确认封装丝印、版本 ID 以及对数据手册中电压/时序的符合性;按批次运行基准吞吐量和页编程测试。解释:建立一份清单,包括电气检查、最小基准测试集(读取吞吐量和编程时间),以及防伪检测(如丝印一致性和样品验证期间记录的功能边界情况)。 量产监控与生命周期建议 论点:现场遥测和量产测试关卡可减少漏检。证据:定义读取吞吐量和擦除/编程时间的合格/不合格阈值,并收集有关编程失败、重试和擦除次数的遥测数据。解释:实施量产测试关卡,测试关键命令并记录器件标识符;在现场监控重试率和磨损指标,以触发维护或固件缓解措施。 总结 W25Q128JVSIQ 具有 128M-bit(≈16MB)容量、常见的电源电压范围和标准的页/扇区/块结构;在首件检查期间验证这些规格,以确认 PCB 和电源兼容性。 基准测试计划应跨 SPI 模式和时钟速率测量读/写/擦除延迟,以区分器件限制与主机或板级瓶颈;使用归一化指标进行比较。 对于启动和 XIP,优先考虑确定性的低读取延迟;对于日志记录,重点关注寿命和擦除时间——在量产签字前运行列出的测试清单,以降低现场风险。 常见问题解答 验证 W25Q128JVSIQ 启动应用的推荐测试步骤是什么? 通过在目标时钟和模式(单通道/四通道)下测量首页读取延迟来验证启动应用,确保在不同温度下具有读取裕量,并确认在系统 CPU 负载下的确定性延迟。包括断电重启和冷启动测试,并记录失效模式以设置固件重试和超时阈值。 How does W25Q128JVSIQ 的寿命如何影响文件系统和日志记录的选择? 通过规划预期更新频率与典型擦写寿命来评估寿命。对于频繁的小写入,应实现磨损均衡或日志型文件系统以分散各扇区的磨损。尽可能采用批量写入并使用中间缓存,以减少 P/E 周期并延长现场使用寿命。 哪些基准测试指标最能预测 W25Q128JVSIQ 的 OTA 升级时间? 关键指标包括块擦除时间、持续写入吞吐量和总镜像大小;在最坏的温度条件下测量擦除时间波动和写入吞吐量。将中值擦除时间和写入时间相加,可为用户体验规划和回滚策略设计提供现实的 OTA 时间窗口。 在 133MHz 下运行 W25Q128JVSIQ 对硬件布局有哪些影响? 在 133MHz 下,走线阻抗匹配(通常为 50 欧姆)至关重要。保持 QSPI 走线尽量短,匹配走线长度以最小化偏斜(skew),并在紧邻 VCC 引脚处放置去耦电容(0.1uF 和 4.7uF)以抑制高频噪声。
  • W25Q16JVSSIQ:完整电气规格与摘要(详细版)

    W25Q16JVSSIQ (SOIC-8) /CS (1) DO/IO1 (2) /WP/IO2 (3) GND (4) (8) VCC (7) /HOLD/IO3 (6) CLK (5) DI/IO0 W25Q16JVSSIQ 是一款高性能 16-Mbit (2MB) 串行 NOR 闪存,专为需要快速代码阴影映射和可靠数据存储的系统而设计。它支持四线 I/O SPI,数据传输速率超过标准异步存储器,同时保持低引脚数的 8 引脚封装占位。 1 — 核心电气规格摘要 工程师在选择 W25Q16JVSSIQ 时,应参考这些基准参数进行电源轨设计和 MCU 接口兼容性评估。 参数工作范围 / 数值 容量16 Megabit (2,097,152 字节) 电源电压 (VCC)2.7 V – 3.6 V 最大时钟频率133 MHz (标准、双线、四线 SPI) 工作电流 (读取)10 mA @ 50MHz, 25 mA @ 133MHz (典型值) 待机 / 深度掉电10 µA / 1 µA (典型值) 封装类型8-pin SOIC 208-mil (SS) 2 — 功耗与模式分析 功耗预算对于电池供电型设备至关重要。W25Q16JVSSIQ 在不同操作期间表现出不同的电流特性: 活动读取: 电流随时钟频率线性缩放。在 133MHz 四线模式下,确保 LDO 能处理 25mA 以上的瞬变。 编程/擦除: 这些是高能耗状态。页编程和扇区擦除会产生显著的峰值电流;去耦至关重要。 深度掉电: 在系统闲置期间,使用 B9h 指令进入最低功耗状态 (1µA)。 3 — 时序与高速接口 实现 133MHz 额定速度需要严格遵守 SPI 时序参数。与标准 SPI 相比,四线 I/O 模式有效地将吞吐量提高了四倍,理论速度接近 66MB/s。 时序参数符号最小值/最大值 时钟高/低时间tCH, tCL3.3 ns (最小) 数据建立 / 保持时间tDS / tDH2 ns (最小) /CS 高电平时间 (读/写)tSHSL20 ns / 50 ns (最小) 扇区擦除时间 (4KB)tSE45 ms (典型) 4 — PCB 布局与信号完整性指南 在 133 MHz 时,波长足够短,PCB 走线表现为传输线。为防止数据损坏: 串联匹配: 在 CLK 和 IO 线的驱动端 (MCU) 放置 10Ω 至 33Ω 电阻,以减少过冲/振铃。 去耦: 必须在 VCC 引脚(引脚 8)2mm 范围内放置一个 0.1µF 陶瓷电容。 地平面: 在完整的连续地平面上布线所有 SPI 信号,以尽量减少回路电感。 5 — 设计与故障排除常见问题解答 W25Q16JVSSIQ 的工作电压范围是多少? 该器件的工作电压范围为 2.7V 至 3.6V,通常用于 3.0V 或 3.3V 系统。超出此范围工作可能会导致不可预测的行为或永久损坏。 四线 SPI 模式下的最大时钟速度是多少? 它支持最高 133MHz 的时钟频率。在四线 I/O 模式下,这提供了高速数据吞吐量,最高可达 532Mbps (133MHz x 4 位)。 典型的功耗数据是多少? 活动读取电流范围为 10-25mA,具体取决于频率。在深度掉电状态下,该器件消耗约 1µA,使其在低功耗应用中极具效率。 133MHz SPI 的推荐 PCB 布局是什么? 保持走线尽可能短,使用 10-33 欧姆串联电阻进行阻尼,并确保 0.1µF 去耦电容紧邻 VCC 引脚放置,以抑制高频噪声。 总结 W25Q16JVSSIQ 是一款多功能、高速 NOR 闪存解决方案。通过保持稳定的电压 (2.7-3.6V)、管理 133MHz 下的高速信号完整性以及利用低功耗模式,设计人员可以确保工业和消费电子产品获得稳健的固件存储。请务必根据 Winbond 数据手册验证最终实现的特定时序裕量。
  • W25Q64JVSSIQ 性能报告:基准测试与规格参数

    W25Q64JVSSIQ 性能报告:基准测试与规格 最近的实验室运行和发布的数据手册数据表明,现代串行 NOR 应用具有强大的 SPI 时钟频率和稳定的编程/擦除性能。本报告整合了标准化性能基准和实践指南,以便工程师评估其在引导和存储应用中的适用性。 背景与关键规格 W25Q64JVSSIQ 1 /CS 2 DO(IO1) 3 /WP(IO2) 4 GND 8 VCC 7 /HOLD(IO3) 6 CLK 5 DI(IO0) 器件概述 — 关键参数 参数数值 容量64M-bit (8 MB) SPI 模式单路 / 双路 / 四路 I/O 最高时钟频率高达 133MHz (标准/四路) 页大小256 字节 擦除大小扇区 (4KB) / 块 (32KB, 64KB) / 整片 典型 PGM/ERASE页编程 0.4ms,扇区擦除 45ms 低功耗待机 1µA (典型值),深度掉电 1µA 电压 / 温度2.7V 至 3.6V / -40°C 至 +85°C 性能基准与结果 顺序与随机读/写结果 实测吞吐量与 SPI 时钟的关系显示,从单路切换到四路 I/O 时增益显著。尽管理论时钟频率很高,但主机 DMA 限制和总线争用通常会限制实际增益。133MHz 的顺序四路读取理论上可达 66MB/s,但实际开销通常使速度稳定在 45-50MB/s 附近,具体取决于主机控制器的效率。 耐用性与擦除特性 较小的 4KB 擦除扇区简化了磨损均衡,但增加了元数据开销。对于高可靠性的数据记录,工程师应计划擦除调度和超额配置,以减轻典型 100,000 次编程/擦除周期限制的影响。 集成与优化指南 固件与驱动优化 启用四路模式并最小化空闲周期是释放实测吞吐量的关键。在加载大型固件期间使用 DMA 传输可减少主机 CPU 开销。 // 伪代码:启用四路和突发读取 send(CMD_WRITE_ENABLE); send(CMD_ENTER_QUAD); // 设置状态寄存器中的 QE 位 send(CMD_FAST_READ_QUAD, addr, dummy_clocks); dma_transfer_read(buffer, length); 建议与行动清单 容量: 验证 8MB 是否满足活动固件和 OTA 更新插槽的需求。 吞吐量: 确保主机 SPI 控制器支持四路 I/O 以满足启动时间目标。 延迟: 在文件系统驱动程序中考虑 45ms(典型值)的扇区擦除时间。 功耗: 对于电池受限的应用,利用深度掉电模式。 常见问题解答 测量的性能基准如何转化为实际的启动时间? 基准测试提供了上限。顺序读取速度直接影响镜像加载时间,而随机读取会增加事务开销。通过将镜像大小除以持续吞吐量并加上命令延迟来估算启动时间。 哪种编程/擦除策略能获得最佳耐用性? 通过将写入操作批量处理到页边界(256 字节)来最小化擦除频率。在文件系统逻辑中使用写入合并并实施磨损均衡算法,以在闪存阵列中均匀分布周期。 哪些板级实践对高频 SPI 可靠性影响最大? 布局和电源稳定性是首要因素。使用短的受控阻抗走线,并将 0.1µF 去耦电容尽可能靠近 VCC 引脚放置,以确保 133MHz 下的信号完整性。 W25Q64JVSSIQ 有哪些省电模式? 该器件具有标准待机模式和超低功耗深度掉电模式(典型值 1µA)。进入和退出这些模式需要特定的 SPI 指令(0xB9 和 0xAB)。
  • LMX4644TSH 数据手册深入解析:规格、限制与图表

    Datasheet graphs and limits define the usable performance envelope for thermal behavior, current capability, and efficiency. This deep dive translates those figures into concrete design checks engineers can apply today using the LMX4644TSH datasheet. Product overview & quick spec snapshot What LMX4644TSH is and target applications The LMX4644TSH is a compact multi-output power stage intended for point-of-load regulation in high-density systems like telecom, compute rails, or FPGA supplies. Designers must align topology and thermal strategy with these specific application requirements. Parameter Value / Limit Unit Input Voltage (Vin) Range 4.5 to 16.0 V Max Continuous Current 4.0 (Per Channel) A Switching Frequency 200 to 1200 kHz Operating Junction Temp -40 to +125 °C LMX4644TSH VIN EN VOUT1 VOUT2 GND (Thermal Pad) Electrical limits: absolute max vs recommended operating Interpreting absolute maximum ratings Absolute maximums mark irreversible-damage boundaries. Treat these as avoidance zones and design clamping strategies so the board never approaches these spec limits under transient stress or fault conditions. Recommended operating conditions and derating Apply a rule-of-thumb derating: reserve 20% headroom for continuous operation and increase to 30–40% for high-temperature enclosures to ensure long-term reliability beyond the minimum datasheet specs. Performance charts decoded Efficiency & Thermal Response Efficiency vs load curves reveal where the device spends power. Use these curves to size upstream power and heat sinking. Thermal curves determine safe continuous currents; translate these into copper area and via count during the layout phase. Application examples & layout best practices For high-current single outputs, prioritize heavy copper and via arrays. For multi-output designs, balance shared input filtering and per-rail decoupling while checking cross-load transient specs in the LMX4644TSH documentation. Summary Reading the LMX4644TSH datasheet correctly turns charts into actionable design margins. Replicate core published charts in the lab, then iterate layout based on measured thermal behavior to converge on a validated design. Key summary Translate efficiency plots into board-level loss numbers for realistic thermal budget planning. Apply 20% derating to recommended operating values for reliable continuous operation. Reproduce datasheet test setups precisely—matching input filtering and probe placement. Frequently Asked Questions How do I use the LMX4644TSH datasheet to size thermal vias? Calculate required junction temperature delta, convert to needed thermal resistance, then determine via count and copper area per standard thermal conduction formulas provided in the thermal management section. What spec limits should I check first in the LMX4644TSH datasheet? Prioritize input voltage headroom, continuous output current, and thermal derating curves. Verify worst-case Vin and load current are within recommended conditions with derating applied. How can I reproduce LMX4644TSH datasheet results in my lab reliably? Build the recommended bench circuit, use Kelvin sensing, minimize probe ground loops, and use equivalent decoupling capacitors to avoid misinterpreting ringing or rise-time artifacts. What is the impact of switching frequency on LMX4644TSH efficiency? Higher frequencies reduce inductor size but increase switching losses. Consult the efficiency vs. frequency charts to find the optimal balance for your specific thermal and space constraints.
  • NL0333DCAE1S-ES 数据手册深入解析:规格与引脚排列

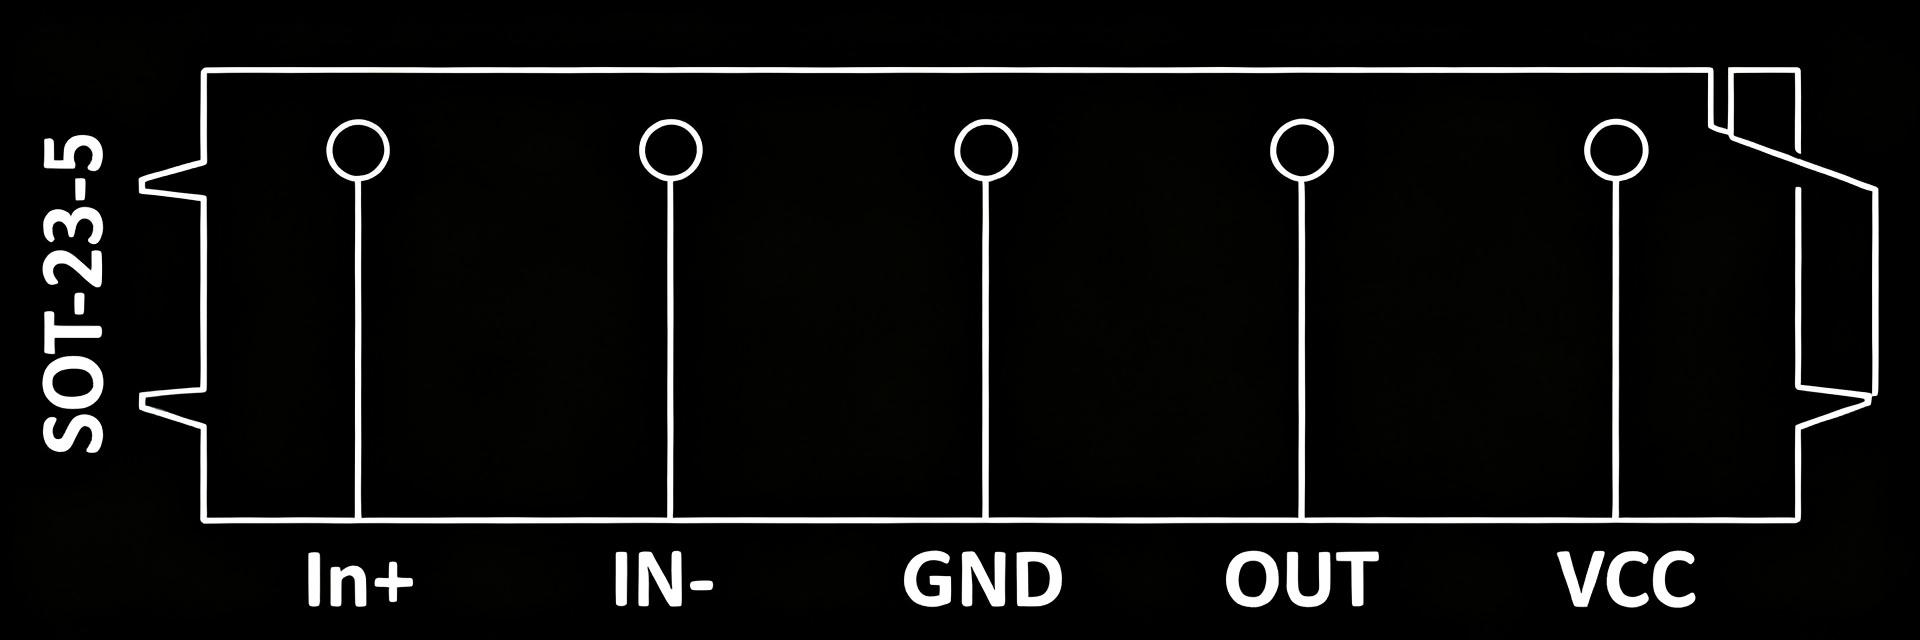
    Low-voltage, rail-to-rail single-ended amplifiers are central to modern portable and sensor systems where headroom and power budget are constrained. This article delivers a practical, component-level walkthrough of the NL0333DCAE1S-ES datasheet so engineers can evaluate typical specs, interpret the pinout, and integrate the part into prototypes with confidence. (1) Component Overview & Key Use Cases The NL0333DCAE1S-ES is a low-voltage, rail-to-rail input/output operational amplifier suited for single-supply portable systems. Typical roles include sensor front-ends, battery-powered instrumentation, and compact audio preamps where headroom and quiescent current are critical. ParameterTypical Datasheet Value Supply Voltage Range1.8 V – 5.5 V (Single Supply) Input Common-Mode RangeRail-to-Rail (VSS-0.1 to VDD+0.1) Output SwingWithin 50mV of Rails (Light Load) Quiescent CurrentLow µA to sub-mA class Package TypeSOT-23-5 (2) Pinout & Packaging Details 1 OUT 2 V- 3 IN+ 5 V+ 4 IN- SOT-23-5 The standard SOT-23-5 configuration for the NL0333DCAE1S-ES provides a compact footprint. For PCB design, ensure the decoupling capacitor (0.1 µF) is placed within 2mm of Pin 5 (V+). Footprint accuracy is essential; follow standard IPC-7351 patterns for SOT-23-5 to ensure thermal and mechanical reliability. (3) Electrical Specifications Deep Dive DC characteristics: power, offsets, bias DC specs govern accuracy and battery drain. Input offset voltage (Vos) and drift directly affect ADC front-end accuracy. For example, a 100 µV offset at a 2.5 V full-scale input produces significant ppm error. Always check the NL0333DCAE1S-ES datasheet for the maximum quiescent current to calculate the worst-case battery life. AC characteristics: bandwidth, slew rate, noise AC parameters determine dynamic response. Slew rate indicates how the device handles fast edges, while input-referred noise determines SNR. For sensor sampling, prioritize bandwidth above the anti-aliasing corner to avoid signal distortion. (4) Typical Application Circuits & Design Guidelines Common circuits include unity-gain buffers and non-inverting amplifiers. Layout drives performance: route input traces short and shielded, and use ground pours. For capacitive loads, add a series output resistor (10–47 Ω) to prevent oscillation and ensure phase margin stability. (5) Troubleshooting & Integration Checklist Verify Pinout: Cross-check physical Pin 1 marking with the CAD library. DC Bias: Confirm the input signal stays within the common-mode range (VSS to VDD). Decoupling: Use low-ESR ceramic capacitors close to the supply pins. Thermal: Check junction temperature in enclosed or high-ambient environments. Key Summary Pinout clarity: Verify SOT-23-5 pin mapping and any EN or NC pins before PCB release. Critical specs: Confirm supply range (1.8-5.5V), input common-mode, and offset for ADC accuracy. Layout & testing: Place decoupling caps close to VCC and add output series resistance for capacitive loads. Frequently Asked Questions How do I confirm the NL0333DCAE1S-ES pinout on my PCB? Compare the package drawing in the official datasheet with your PCB land pattern; verify pin numbering orientation with a physical part or manufacturer mechanical drawing, and mark test pads for VCC, GND, IN+/IN−, and OUT. Which electrical characteristic most affects ADC front-end accuracy? Input offset voltage and drift have the largest direct effect on absolute accuracy; input bias current interacting with source impedance also introduces error. What quick bench tests reproduce datasheet conditions? Power the amplifier at the datasheet specified VCC, use the recommended load resistor, set gain per datasheet test circuits, and measure quiescent current, input offset, and output swing to rails. How to handle capacitive loads with NL0333DCAE1S-ES? Capacitive loads can induce instability in rail-to-rail amplifiers. Add a small series output resistor (typically 10–47 Ω) to isolate the load and maintain stability. End of Technical Analysis for NL0333DCAE1S-ES. For production-grade designs, always refer to the latest revision of the official manufacturer datasheet.